Abstract
here, we’ll get to know your camera, its basic functions, the exposure triangle and the sunny 16 rule.
after approximately forever of waiting or hoping or wishing or daily hustling to lay hands on one, you’ve found yourself with a camera, but with all its dials and rings and meters and timers and bits, it seems like a bit much to get the hang of. everybody else holding one of these things seems to just know. well, just like you, they all had to start somewhere.
originally called the camera obscura, or “dark chamber,” a camera is a box that only selectively lets light in. the earliest of these were rooms large enough to fit a group of people in, though these didn’t record anything. recording came later. today, cameras are usually only big enough to fit their guts, but the function is the same: they only selectively allow light in, typically through a shutter and an aperture. a shutter is a part of the camera that opens and closes, usually on a timer, to control how long light goes into the camera. and aperture, also called an iris in some places, is a hole that grows and shrinks to determine how much light gets into the camera while the shutter is open. how much light and for how long, those are your two most basic decisions in taking a picture. of course, there are other decisions, but here is where we will start.
(cropped from an image by Dariusz Sankowski, Creative Commons licensed CC0)
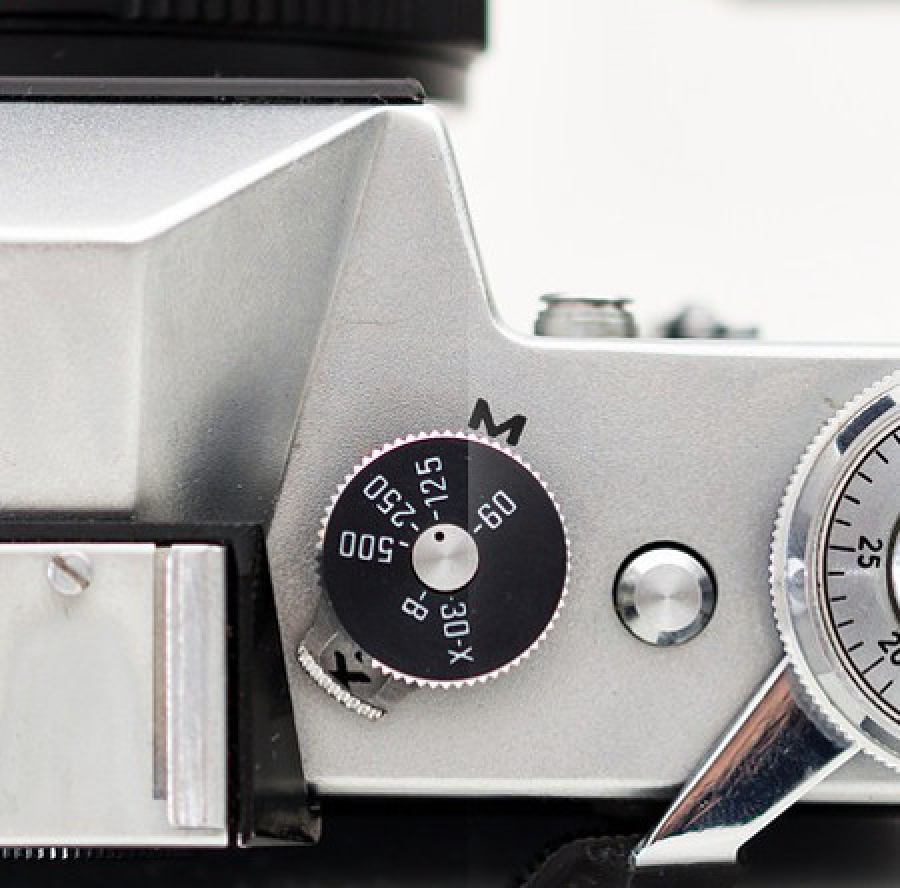
the shutter is the part of the camera that determines how long light is allowed into the camera. the way the shutter is controlled is through a dial, usually on top of the camera, that has numbers on it like 30, 60, 125, 250, 500 and letters like B or T. the numbers on the shutter dial are fractions of a second, with some exceptions (whole seconds are always marked, as in 1s or 2”), so 500 is actually 1/500 of a second, 30 is 1/30 of a second, 4 is 1/4 of a second. in other words, the bigger the number, the faster the shutter, the less amount of time light is allowed into the camera. light accumulates in a camera: every exposure is the sum total of all of the light that was able to get into the camera while the shutter was open. what this means is, a longer shutterspeed allows for motion to smear, and a shorter one freezes motion.

a longer shutterspeed will allow for smear,

while a shorter shutterspeed will freeze action.
(cropped from an image by Frantisek Krejci, Creative Commons licensed CC0)
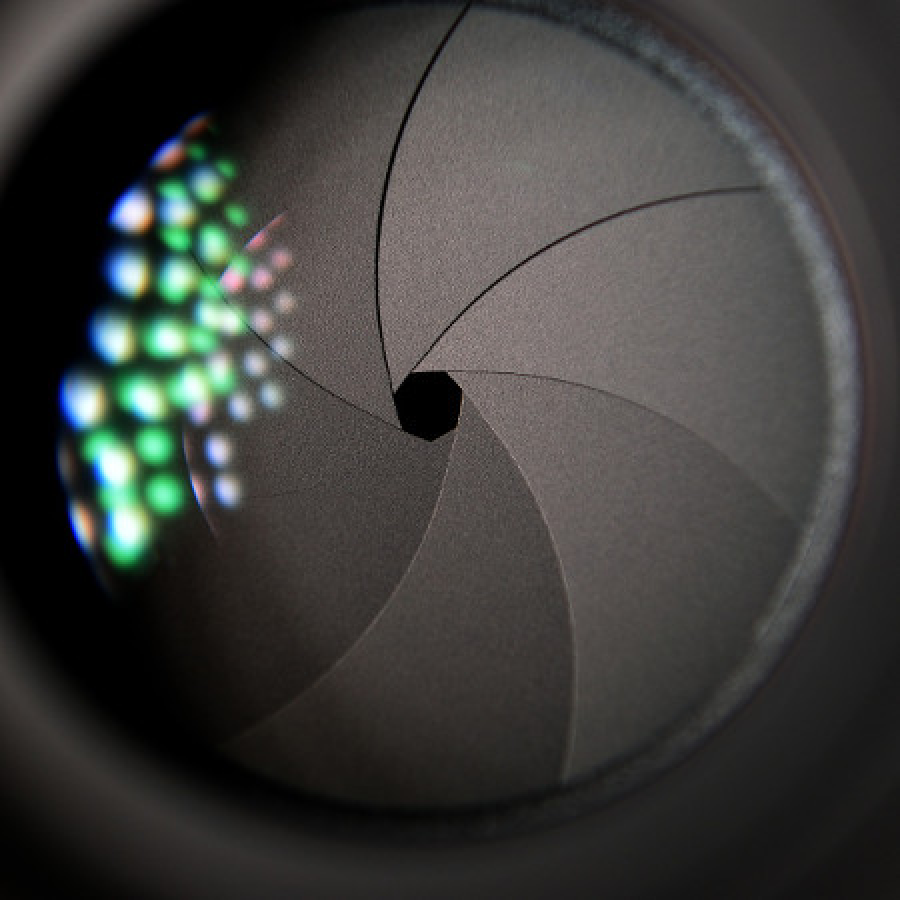
the aperture is the part of the camera that determines how much light is let into the camera while the shutter is open. the controls for the aperture are usually found on the lens itself.
(cropped from an image by Dariusz Sankowski, Creative Commons licensed CC0)
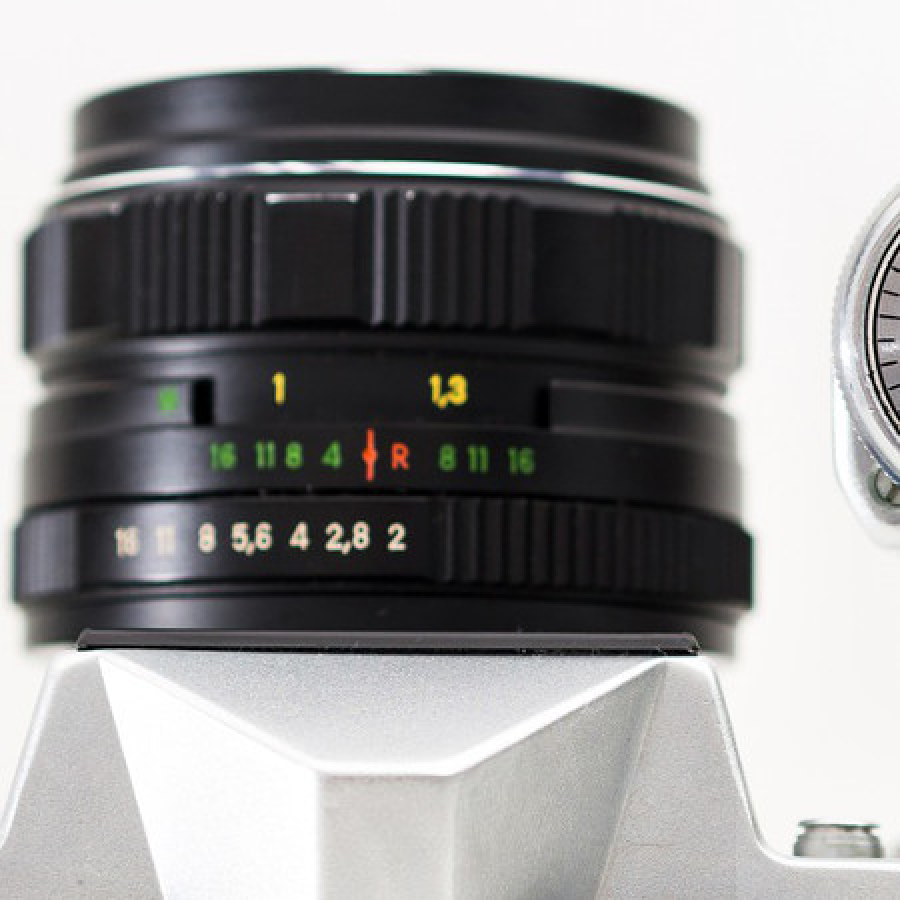
the aperture ring is recognizable as the control marked with numbers like 2, 2.8, 4, 5.6, 8 and so on. these numbers are multiples of the square root of 2 and, like the shutterspeed, represent fractions, this time of the area of the aperture, compared to the front of the lens, as viewed through the front of the lens. sounds weird, i know, but the important thing to remember is these numbers represent fractions, and so the smaller the number, the wider the aperture, or, the smaller the number, the smaller the difference in the area between the front of the lens and its opening into the camera. these numbers are generally represented as f/n, ’n’ being your multiple, as in f/2, f/2.8, f/4 etc. and since these are areas, each step between the multiples of the square root of 2 doubles or halves the amount of light allowed in. and so, an aperture of f/2 has double the area and allows double the light of f/2.8. the effect this has over an image is the size of the depth of field, which is a domain of your focus.
your focal point is the point at which the light reaching your lens converges. imagine a cone with the front of your lens as the base, and a point somewhere in front of the lens. where that point is, is your focal point. this is the point in your image where everything is sharp, rather than blurry. the focus ring on your camera is usually on the lens itself, usually in front of the aperture ring.
so, the depth of field is the distace in front of and behind your focal point that also appears in focus. the wider your aperture, the smaller its number, the shallower (or thinner) your depth of field, and vise versa. i like to imagine this as water flowing into your camera instead of light (note: don’t pour water into your camera): when the aperture is narrow, the flow is controlled, slow, neat; wider and the flow is torrential, messy, splashing everywhere.

so once again, a lower number means a larger aperture and a shallower depth of field, meaning very little of the distance outside of the focal point is in focus,
and a larger number means a smaller aperture and a greater depth of field, which means more of the distance away from your focal point is in focus.
this last concept doesn’t always have a control on the camera itself, if you’re shooting film, and sometimes you’ll have reason to outright lie to your camera about it anyway. this one, usually on a dial on the opposite side of the camera from the shutterspeed dial, is marked in numbers that double, like 50, 100, 200, 400 and so on. this last major setting is your sensitivity, also called film speed, iso (after the international organization of standardization, which adopted these ratings), asa (after the american standards association (now ANSI), which developed these ratings) or exposure index. this number is a rating of your film’s or sensor’s sensitivity to light. unlike the other two sets of numbers we discussed, this one is not a fraction. bigger numbers mean more sensitivity. the general tradeoff with more sensitive/faster film or sensor settings is noise in the image.
these three settings: shutterspeed, aperture and sensitivity, will determine your exposure. in a given situation, you can double any of the three settings as long as you cut another in half. to give you a situation, i’ll share a general rule known as sunny 16: outside, on a clear, sunny day, you can generally get a good exposure of anything sunlit by setting your aperture to f/16 and your shutterspeed as close as possible to (the inverse of) your film sensitivity. and so, shooting an iso 100 speed film, with your aperture at f/16, you’ll get a good exposure by shooting at a shutterspeed close to 1/100 of a second, which usually turns out in pratice to be 125 since shutterspeed dials often don’t have a setting at 1/100 of a second. but let’s say you want a shallow depth of field and frozen action, like one might want when shooting sports. in this case, you can open up your aperture and crank your shutterspeed up accordingly. below is a marked table of good exposures or iso 100 film on a clear, sunny day.
| x: aperture y: shutterspeed | 22 | 16 | 11 | 8 | 5.6 | 4 | 2.8 | 2 |
| 60 | * | |||||||
| 125 | * | |||||||
| 250 | * | |||||||
| 500 | * | |||||||
| 1000 | * | |||||||
| 2000 | * | |||||||
| 4000 | * | |||||||
| 8000 | * | |||||||
naturally, there is more. there’s always more, which is the beauty of photography. but for now, this should be enough. go out, shoot and enjoy yourself! if you found this guide helpful, please consider pledging to my patreon campaign or sending me a tip through paypal. thank you!